
 In this video, we take a look at the mobile features in 121 calls, group calls and scheduled conference calls using our iPhone for voice and video. Check out all the rest of our Teams series here. The most recent Teams posts are below: How To Sync, Link, Save and Search How To Manage Channel Notifications In Teams How To Manage Email Notification In Teams How To Turn Off Notifications in Teams How To Find Things In Teams To get the most out of Teams you will need an Office 365 subscription. Click the link to save £20 off Office 365 when purchased with any Surface/PC.  In this video we have a reminder about why @mentions in Teams are important and take a look at cross-channel mentions.  Today we are going to cover something that people usually forget straight after training which is @mentioning. Remember to do an @mention in every new post you put on Teams unless it's a reply. We also cover some changes that Microsoft made to the way you can @mention channels. Remember if you just start typing something in and hit enter it will go straight into the chat window and if you haven't @mentioned anybody we can safely assume that no one's going to see that message, especially in high traffic Teams. When someone puts another message beneath you or replies to a message above you everything gets sorted in order of the latest message at the bottom in Teams. So if someones replied to a thread above you the entire thread will jump down to the bottom and bump your message off the top. If someone then replies beneath you and does an @mention for the whole channel, people are going to see that notification pop up in their activity feed and when they click that notification they'll get taken to the channel and your message might have been in one of those things that they've not read and then there's no prompt for them to go back. If you do @mention someone individually, or the channel, then people are going to get notified and your message is going to appear in their feed. Teams does try to help you out by showing "start a new conversation, type @ to mention somebody" and if you just start typing an @ and start typing somebody's name it'll quickly pop up with a list of suggestions for you to tag. So that's how to tag someone individually, if you want to tag the channel remember if you just start typing @channel then it will suggest the channel that you are in. Everybody that has shown that channel, which used to be called favoriting the channel, will get notified about that message. The change to channel mentioning that Microsoft has just released in Teams is that you can @mention any other channel from any other channel. If you want to @mention another channel just start typing that channel's name. We want to be really careful about tagging general by accident because general is the only channel that you cannot hide or hide so everybody in the Team will get pinged about stuff that you tag general so we really want to be conscious to only tag general if the post is applicable to the whole Team. Check out all the rest of our Teams series here. The most recent Teams posts are below: How To Get A New Line When Hitting Enter How To Manage Channel Notifications In Teams How To Manage Email Notification In Teams How To Turn Off Notifications in Teams How To Find Things In Teams To get the most out of Teams you will need an Office 365 subscription. Click the link to save £20 off Office 365 when purchased with any Surface/PC.  How To Sync, Link, Save and Search - Microsoft Teams Tutorial 2019. In this video, we take another look at how best to find things in Microsoft Teams as this is one of the top topics once everything is moved into Teams. We take a look at three ways (and a bonus way) to keep everything in order: sync with OneDrive, link files and chat conversations, saved items and searching. Check out all the rest of our Teams series here. The basics Teams posts are below: How To Manage Channel Notifications In Teams How To Manage Email Notification In Teams How To Turn Off Notifications in Teams How To Find Things In Teams How To Move Files To Teams To get the most out of Teams you will need an Office 365 subscription. Click the link to save £20 off Office 365 when purchased with any Surface/PC. In this short post we cover how to avoid posting when you wanted a new line... and how to recover if you do it by accident.  One of the main things that people forget after training is hitting enter sends your message and how to recover if you do do that by accident. Watch the video below or scroll down for the text and picture version.
 Hit the format button for more space to type and turn hitting enter into a new line rather than sending your message If you do need to write a longer message with some spaces in between the lines then it's this little format box that you want to hit before you start typing. This pops up a bigger text box and you can put a subject line or format the message a little more like an email. If the text box is big like this then when you start typing and hit enter you'll get a new line to make your longer message easier to read. When you are ready to send it then click this little paper plane icon to get it out into the world. 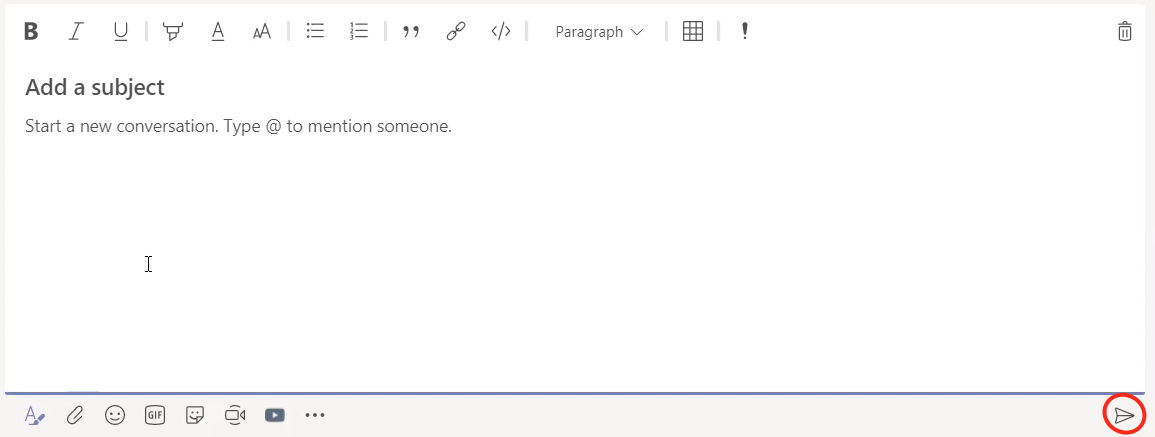 When the text box is big hitting enter creates a new line. The paper plane icon sends your message. Check out all the rest of our Teams series here. The most recent Teams posts are below: How To Manage Channel Notifications In Teams How To Manage Email Notification In Teams How To Turn Off Notifications in Teams How To Find Things In Teams How To Move Files To Teams To get the most out of Teams you will need an Office 365 subscription. Click the link to save £20 off Office 365 when purchased with any Surface/PC. 
In this post we look at three different ways to move your files into Teams: directly, via SharePoint and via OneDrive sync (which also has the benefit of being able to get your Teams files offline)
So you've started using teams and now you want to get all of your files that were stored somewhere else, probably in a Shared Drive or another SharePoint site, into Teams files. I'm going to show you three ways of moving your files over and, skipping ahead, the third way is the best way so keep reading.
Okay so like I said there's three ways of moving your files over.
The first way we're gonna look at is just directly into Teams and I'll let you know some of the limitations about doing it that way. The second way is via SharePoint which might you need a different browser for, potentially, so anything but Internet Explorer. And the third way which I said it's the best way is via OneDrive sync so if you don't know anything about OneDrive we'll touch on that a bit later. Moving Files Into Teams Directly
The first way is just directly in Teams itself.
Imagine I've got two folders and two files in each folder and I just want to move everything over that I used to work on and move it into teams and retain the folder hierarchy. Whether you use the upload button or just drag both folders on top of the Teams files tab, this will upload the files but not the folder structure. If you didn't have many files to move then this is the quickest way because you don't need to go anywhere else but Teams but if you're moving everything over that you used to work on in bulk into Teams, probably step 2 or step 3 are going to be better for you 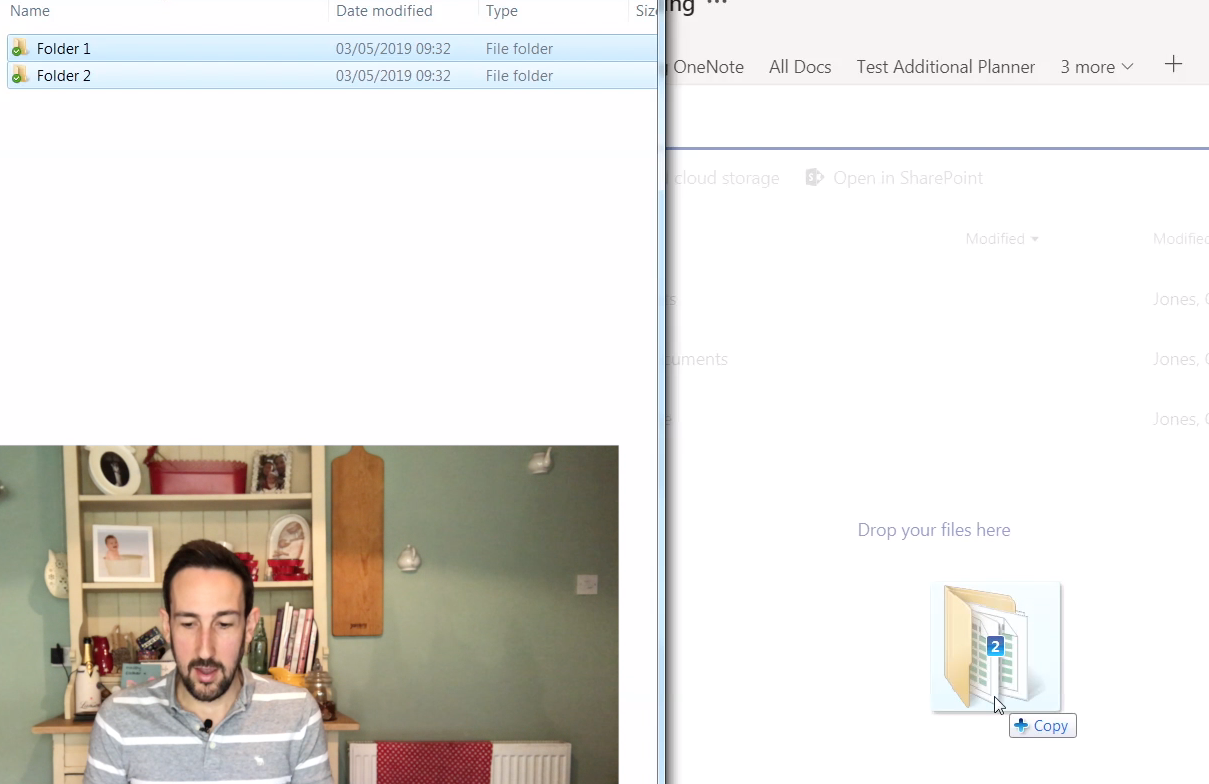
Dragging folders directly into Teams uploads all files but loses folder structure
Moving Files Into Teams Via SharePoint
The second way to get your files and folders into teams is by using SharePoint.
In Teams in the files tab in any channel, you'll see an option at the top which says "open in SharePoint." This opens the web version of your files in Teams. If you use Internet Explorer this method won't work because it will not let you drag the files on top of it so you'll need another browser such as Google Chrome or Edge. If you want to move all the files over once you've got to this point it's really as easy as selecting all the folders you want and then just dragging them onto the window. You'll see it says copy there so you know it's gonna work correctly. Unlike dragging folders onto Teams, this method will keep our folder structure. If we go back to Teams that's gonna show us exactly the same thing, you might have to refresh the view and then you'll see it all the folder structure appears in Teams as well. If you've got a lot of files and folder structure to move over then this is a very quick way to move all of your files and folders over into Teams. 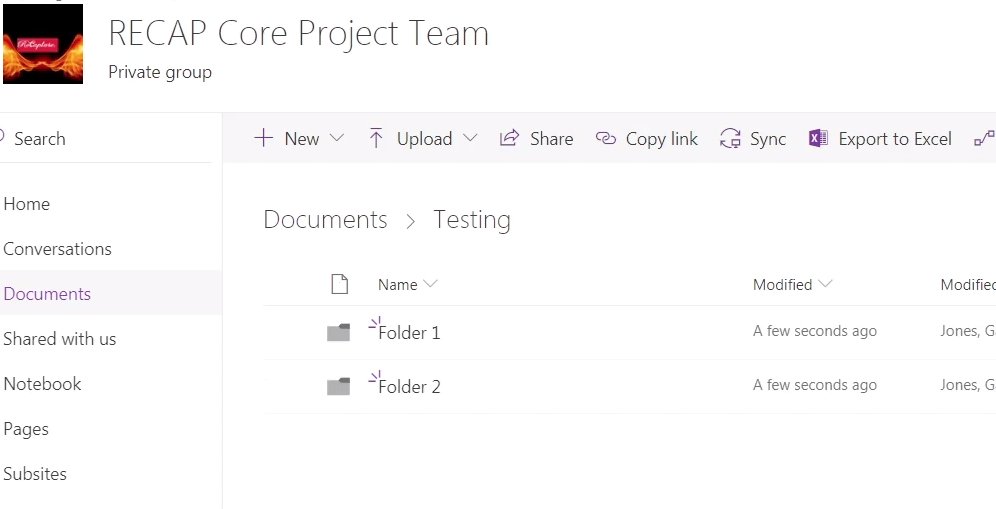
Dragging folders into the SharePoint view of Teams files retains folder structure
Moving Files Into Teams Via OneDrive Sync
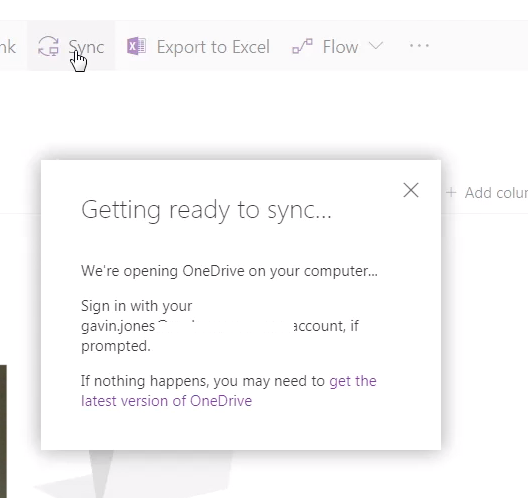
So the way to do that again is to open your file view in SharePoint again. Go into the files tab of whichever channel you want to sync, open it in SharePoint and then you'll see there's just a little sync button at the top of the screen. If we click sync it's going to pop us up a dialog box in OneDrive which asking what do you want to sync. You can sync anything in Teams, or in SharePoint (as SharePoint is just the bit that handles files in Teams) so you want to make sure that you're in the right folder so you probably don't want to sync everything in the entire Team especially in a large Team because that's going to be a lot of files it's going to take up space on your hard drive (unless you use files on demand).
Once this is done, if you're used to using OneDrive where you've got the OneDrive icon on the left hand side of your explorer window where you can see all of your personal files, you'll now get another little icon which says your company name which is where all of your synced files from SharePoint sites will appear. Now it's synced it acts like any other folder in Windows, so we can drag the folders into this explorer window and we'll get a little blue icon to show it's syncing now back up to the cloud. Once those ticks are green then they'll now appear back in Teams. That's probably the best way of syncing your files and having an offline copy as well. So let us know you thought of this post and to like and subscribe in YouTube, and leave us a comment if you want to see more of this type of content or if there is anything else you want us to cover.
Check out all the rest of our Teams series here.
The most recent Teams posts are below: How To Manage Channel Notifications In Teams How To Manage Email Notification In Teams How To Turn Off Notifications in Teams How To Find Things In Teams To get the most out of Teams you will need an Office 365 subscription. Click the link to save £20 off Office 365 when purchased with any Surface/PC. 
In this video we look at how to keep track of things in Microsoft Teams that you might want to go back and re-visit. We look at mark as unread, save for later and the search box.

Okay so you just started moving your conversations over from emails to teams but you're finding that you're losing some messages.
Maybe you read stuff on your phone and you want to get back to it when you're on your laptop or you're just having a scroll through and you thought "ah, that's really important." How do I save stuff to go back and see it later when I return to it. Today we're going to take a look at three ways you can get back to something that you've seen in teams that you want to revisit. Mark As Unread
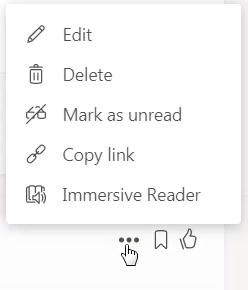
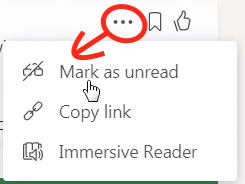
On any message you can click the three dots and get more options. One option is "mark as unread" and if you click that it'll put a purple line across to say this is where you were up to when you last read the channel and it'll make the channel go bold.
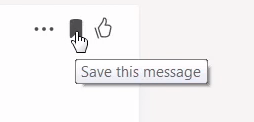
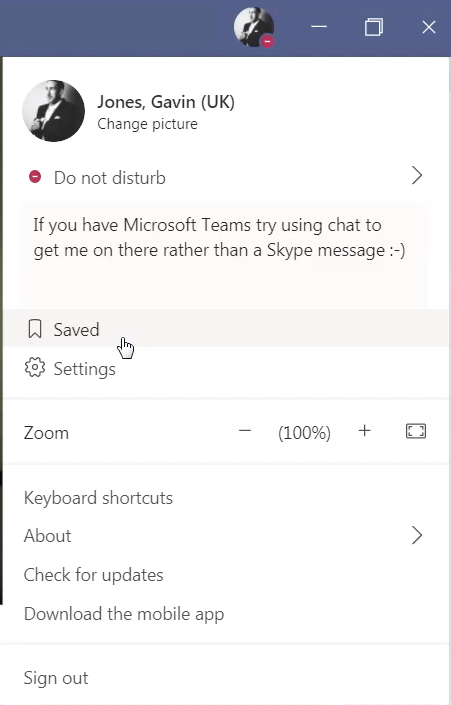
That's the first easiest way to say well you were keeping up to date with the channel and it's bold you're probably going to go back through and read what's in there. The downsides with the first approach is that if someone does an @mention or channel mention in that channel and you click on that notification and go into the channel it's going to assume that you've read everything in that channel so that's why you might want to use the second method. Save For Later
Search Bar
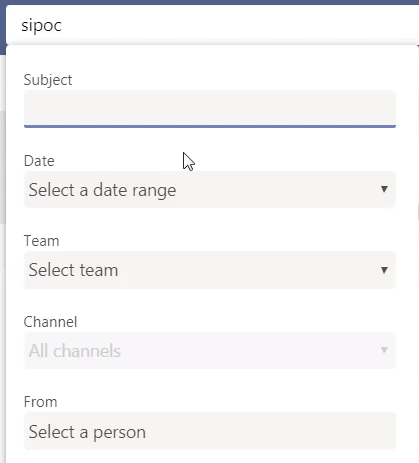
The third way is a catch-all. The search in Teams it's really good and fast.
Imagine a scenario where you were just browsing through Teams on your mobile phone, you saw that there was something there that you would need to go back to but then you got interrupted so you didn't mark it as unread, you didn't remember to save it and you think "ah, how do I get back to it. I don't know what channel it's in, I don't know where to scroll." Let's use an example of a search I did myself the other day. I wanted to go back to some documents that were as part of a project Team. If I search for "SIPOC" and hit enter I'm gonna see all the messages where's "SIPOC" has been mentioned in any Team in any channel and I can scroll through and click them it'll take me to the thread. I can also see any files attached to that thread. As well as that if I just want to get back straight back to a file it does a search across all of the files that I've got access to: in any Team, in any SharePoint site and in any files in my OneDrive. It's also going to search all of those both in the title and within the documents body.
So let us know you thought of this post and to like and subscribe in YouTube, and leave us a comment if you want to see more of this type of content or if there is anything else you want us to cover.
Check out all the rest of our Teams series here.
The most recent Teams posts are below: How To Manage Channel Notifications In Teams How To Manage Email Notification In Teams How To Turn Off Notifications in Teams To get the most out of Teams you will need an Office 365 subscription. Click the link to save £20 off Office 365 when purchased with any Surface/PC. 
Find out how to turn off notifications in Microsoft Teams in this tutorial.
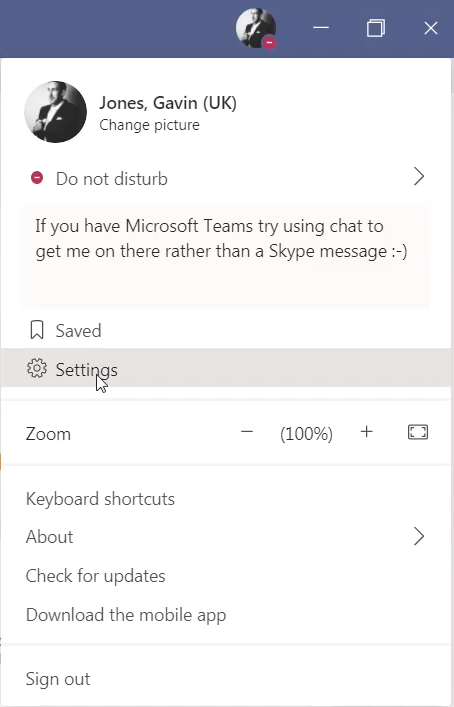
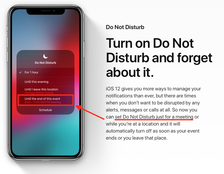
You need to get some focussed work done and you do not want to be disturbed. Here is how to change Teams status settings temporarily to keep you from getting distracted.
To get the most out of Teams you will need an office 365 subscription. Click the link to save £20 off Office 365 when purchased with any Surface/PC.

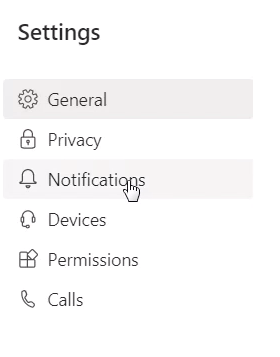
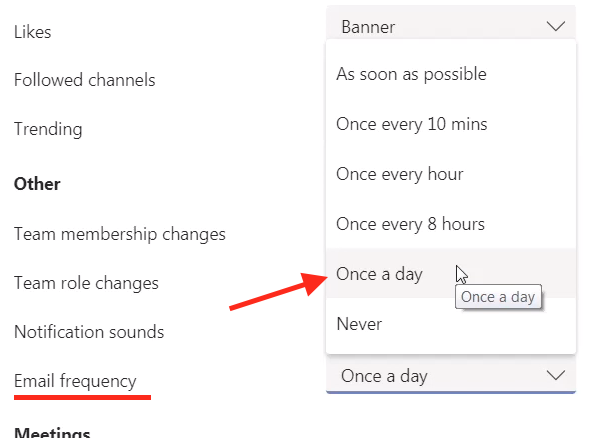
Now you are on Teams and using it regularly you don't need loads of emails directing you to a Teams message you are going to see anyway. Find out how to reduce the amount of email notifications you get from Teams.
To see more on notifications in Teams, see our previous post on channel notifications first
Stay tuned for more in our Teams series - follow this blog post in RSS or sign up to our newsletter, subscribe to our channel in YouTube or follow us on your favourite social platform @meetimeapps To get the most out of Teams you will need an office 365 subscription. Click here to save £20 off Office 365 when purchased with any Surface/PC. 
How To Manage Channel Notifications In Microsoft Teams? Are you getting notified too much from Microsoft Teams? In this post I'll show you the first thing you want to do when trying to manage your notifications in MS Teams.
Read more below or watch the video to see how it is done.
Find out the first thing you should do when joining a large team.
If you have just been added to a team and are getting overwhelmed by the number of notifications, this is the post to read first. Check out the video or follow the steps below. For the rest in the notifications series, or for all Teams tips, check out the links at the bottom of the page. *Note: Since this post was written, Microsoft has updated Teams and "Favourite" now appears as "Show" and "Hide" - the behaviour is the same, however. 
To favourite a channel, go to the "more channels" section at the bottom of your team, click to expand it and then click on the star of the channel you want to favourite

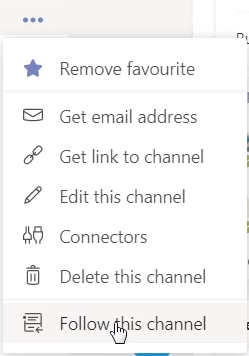
To remove a favourite, click on the three dots to the right of the channel in view and select "remove favourite"
"Follow" notifies you about all posts to a channel regardless of whether they @mention the channel or not. We do not recommend following any channels as this might overwhelm you with notifications Remember, favouriting a channel does two things:
Stay tuned for more in our Teams series - follow this blog post in RSS or sign up to our newsletter, subscribe to our channel in YouTube or follow us on your favourite social platform @meetimeapps
To get the most out of Teams you will need an office 365 subscription. Click here to save £20 off Office 365 when purchased with any Surface/PC. 
Time Is Money - Calculate Your Meeting Costs Before You Start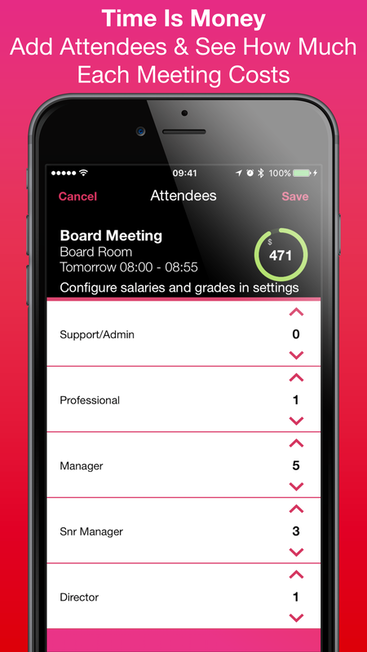
With the latest update now available on the Apple AppStore, MeeTime meeting timer adds the ability to calculate the costs of your meeting.
Combining a meeting cost calculator into a meeting timer app allows you to see the estimated cost of the meeting both as you are planning the meeting and while you are running it. To find out why you should be using a timer for your meetings at all, read this first. If you have never worked out the cost of your meetings before then we think you might be shocked at the amount even a simple meeting costs. For a very quick glance, try the free one at HBR. We costed a recent conference call for the whole sales force of a large corporation at £7.5k. It really puts into perspective the value of time you can save by finishing early. This particular meeting finished early and saved over £1k worth of time. Setting Up MeeTime to Calculate Meeting Costs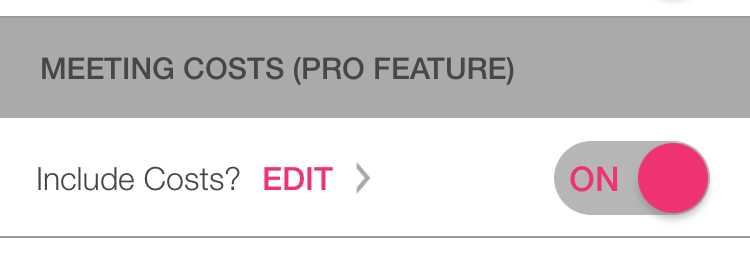
To set up the meeting cost calculator in MeeTime, you need to have a pro version of the app, either by purchasing the app previously or by signing up for a pro subscription (a two week free trial is available on all plans at the time of writing).
If you have a pro version, the meeting costs section in the setting should automatically switch to “on.” In settings, you can click on edit to change the default average salaries by grade for your organisation. 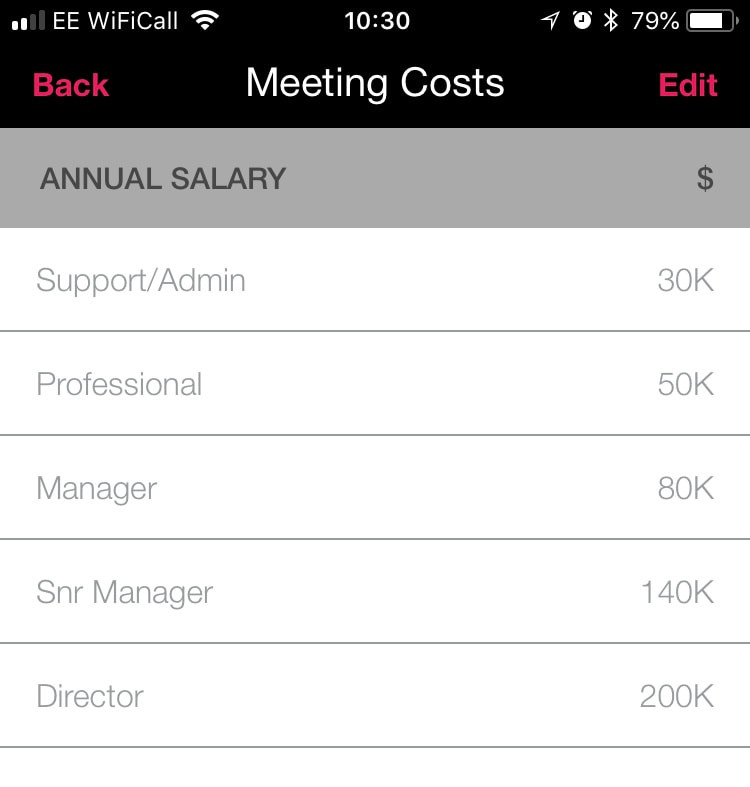
If you have no idea then you can leave them as they are. The dollar amount is just to denote currency amount rather than the actual currency, you do not need to convert your salaries into dollars if you are using the app in other currencies unless you want to.
Remember to include fully costed salaries for this part so you can really understand what the value is the organisation rather than the individual's. A rough rule of thumb is to double the amount of gross salary that you estimate each grade to get paid. This allows for employers pension/401k contributions, national insurance / health care and any other benefits that the company might provide for their employees.
Once you have done the set up, or left the default settings, the next time you add a meeting and get to the agenda entry screen, you will see an option at the top to add costs to the meeting. This is the meeting cost calculator part.
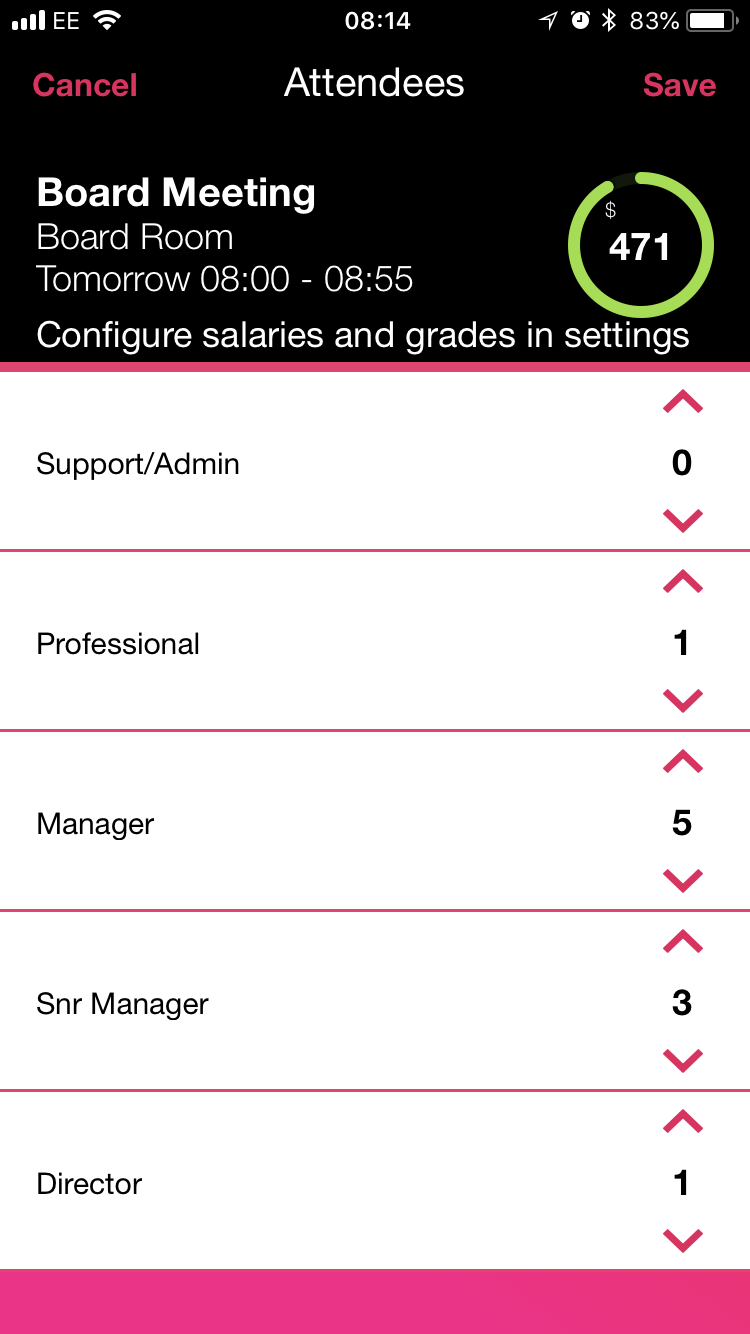
You will have already, or will next, add the timings to the meeting. The costs per grade are already set as they are unlikely to change very frequently. So all you need to do now is add the number of attendees from each grade that you think will be coming to the meeting. If you are running a meeting with guest speakers coming in and out revolving around a core group, then we advise to simply enter the average amount of people in the room for the whole duration to make the costs calculate most accurately. The time in the circle in the top right will show the cost of the meeting if you have already entered the agenda. If not, when you go back to add the agenda timing the text in the circle will cycle in between showing the duration of the meeting and the cost of the meeting. Once you are done, just hit save like normal, add the meeting to your calendar if needed and wait until 15mins before the meeting start time to get a notification pop up from MeeTime and get set to have a great meeting! 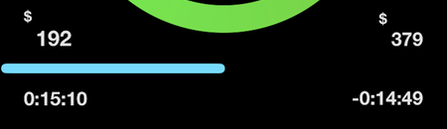
Calculate Meeting Costs In Real Time With MeeTime
The benefit of having the meeting cost calculator within the meeting timer is that you can see costs in real time during the meeting (above). This really focuses the mind when you can see the costs increasing each second, especially in with a large meeting agenda.
Again, for a quick glance for free to see how much your costs trickle upwards, use this free web app. For more sophisticated meeting tracking, see the MeeTime app in action below:
Find out more at www.meetimeapps.com or download from the AppStore now
More On Meetings
More From The Blog

Download now or find out more (click app in the header bar)
|
Archives
August 2020
Categories
All
|


 RSS Feed
MeeTime Copyright © 2016
*Goldman Sachs, Rolls Royce, Nielsen, Molson Coors, DXC Technologies, Hewlett Packard Enterprise and their respective logos are trademarks and are in NO WAY affiliated, endorsed by or associated with MeeTime.
MeeTime Ltd is a participant in the Amazon Services LLC Associates Program, an affiliate advertising program designed to provide a means for sites to earn advertising fees by advertising and linking to Amazon.com.
*Amazon and the Amazon logo are trademarks of Amazon.com, Inc., or its affiliates.
Additionally, MeeTime Ltd participates in various other affiliate programs, and we sometimes get a commission through purchases made through our links.
*Amazon and the Amazon logo are trademarks of Amazon.com, Inc., or its affiliates.
Additionally, MeeTime Ltd participates in various other affiliate programs, and we sometimes get a commission through purchases made through our links.